Source: support.xbox.com
The Xbox 360 Wireless Gaming Receiver for Windows lets you connect up to four wireless headsets and four wireless controllers to a computer running Microsoft Windows XP with Service Pack (SP2) or a later version of Windows.
Note The receiver is not intended for use with an Xbox 360 console.
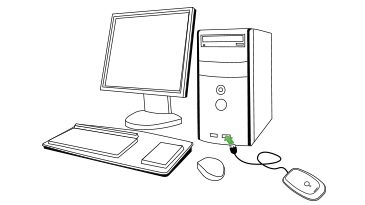
Step 1: Connect the Xbox 360 Wireless Gaming Receiver to your computer- Remove the green label from the USB connector on the receiver.
- Insert the USB connector into a powered USB 2.0 port on the computer.
 |
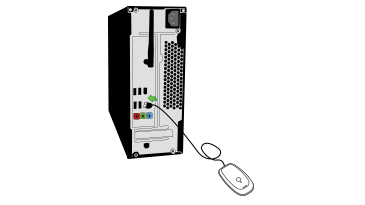 |
Note The USB ports on the front of your computer are probably not powered USB 2.0 ports. Try using the ports on the back of your computer.
A green light on the receiver indicates that the unit is working.
- If the Add New Hardware Wizard starts automatically, select Install the software automatically (Recommended), and then click Next. If the wizard installs the software successfully, click Finish and then skip to Step 3: Connect an Xbox 360 wireless accessory to your computer, below.
Step 2: Install the Xbox Receiver softwareIf the wizard fails to install the software, continue with the next section.
Note Before you can use wireless accessories with your computer, you might need to install some software on your computer.
If you have the installation disc that came with your Xbox 360 Wireless Gaming Receiver, you can install the software from that disc.
To install the software from disc- Insert the installation disc into the CD or DVD drive of your computer. If the Setup program does not automatically start, change to your CD or DVD drive, and then run the Setup program.
- Follow the steps in the wizard to install the software.
Note You might be prompted to restart the computer.
Step 3: Connect an Xbox 360 wireless accessory to your computer
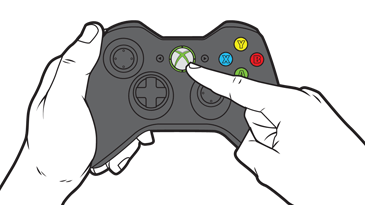
- Turn on the Xbox 360 wireless accessory that you want to use with your receiver.
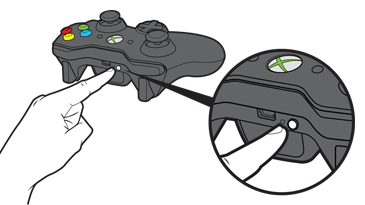
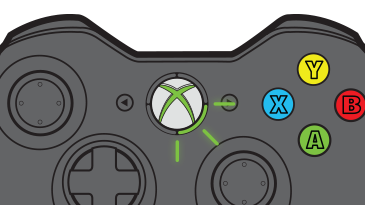
For example, to turn on a controller, press and hold the Guide button in the middle of the controller. If you do not know how to turn on the accessory, read the documentation for that accessory.
 |
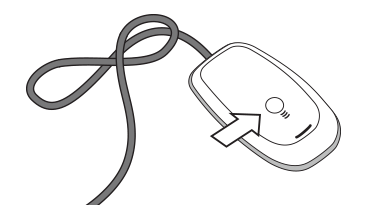
- On the receiver, press the connect button. The light flashes green.
 |
- On the wireless accessory, press the connect button. For example, on the controller, the connect button is on the back.
 |
Green flashing lights on the accessory and on the receiver indicate that the device is trying to establish a connection. When the lights stop flashing and remain lit, the accessory is connected. For example, on a wireless controller, one of the lights around the Guide button will remain lit.
 |
Troubleshooting the Xbox 360 Wireless Gaming Receiver
The green light on the receiver does not illuminate
When you plug the Xbox 360 Wireless Gaming Receiver for Windows into a USB 2.0 port, the green light on the Xbox 360 Wireless Gaming Receiver for Windows does not light up. This can occur for any of the following reasons:
- The Xbox 360 Wireless Gaming Receiver for Windows is not plugged correctly into the USB port.
- The Xbox 360 Wireless Gaming Receiver for Windows device driver is not working as expected, or the driver is out of date.
- The USB hub is overloaded.
Important The Xbox 360 Wireless Gaming Receiver for Windows is designed for use on a computer that is running Microsoft Windows XP with Service Pack 1 (SP1) or a later version of Windows and that has a powered USB 2.0 port.
Solutions
- Verify the USB Connection. Here’s how: First examine the USB connection of the Xbox 360 Wireless Gaming Receiver for Windows. Make sure that you've connected the Xbox 360 Wireless Gaming Receiver for Windows to a powered USB 2.0 port on the computer. The best way to verify the connection is to unplug the Xbox 360 Wireless Gaming Receiver for Windows from the USB port, and then plug the receiver back in. If the light still doesn't illuminate, try connecting the receiver to a different USB 2.0 port on the computer.
- Verify the device driver. The following steps will help you verify that the device driver for your Xbox 360 Wireless Gaming Receiver for Windows is working correctly and that you have the latest device driver.
- Open Device Manager. To do this, follow these steps:
For all versions of Windows 8 and Windows RT
- Swipe in from the right edge of the screen, and then tap Search. Or, if you’re using a mouse, point to the lower-right corner of the screen, and then click Search.
- Type devmgmt.msc, and then tap or click Device Manager in the search results.
For all versions of Windows 7 and Windows Vista
- Click Start, and then click Run.
- Type devmgmt.msc in the Run box, and then click OK.
- In the list of different devices, locate the entry for XBOX 360 Peripherals.
- To the left of XBOX 360 Peripherals entry, locate and click the plus sign (+). The entry should expand to show all the peripheral devices for Xbox 360 that are attached to the computer.
- Locate and then double-click the Xbox 360 Wireless Receiver for Windows entry. The Xbox 360 Wireless Receiver for Windows Properties dialog box opens.
- Verify that the following screen appears and that the Device status area displays the text, "This device is working properly."
- Open Device Manager. To do this, follow these steps:
 |
If the device does not appear in Device Manager or if the Device status area does not indicate that the device is working, verify that the software is installed correctly. See the section “Step 3: Connect an Xbox 360 wireless accessory to your computer,” earlier on this page.
- Verify the USB port device. If you have the Xbox 360 Wireless Gaming Receiver for Windows device plugged into a USB hub together with other USB devices, it’s possible that the USB hub can’t provide sufficient power for all the devices that are plugged into it.
Note The ports on the back of a PC are typically powered ports. The ports on the front of a PC may not be powered ports. Additionally, an external USB hub does not provide powered ports if it doesn’t have its own separate power supply/AC adapter.
To avoid exceeding the amount of power that the USB hub can provide, follow these steps:
- Connect the Xbox 360 Wireless Gaming Receiver for Windows directly to a powered USB 2.0 port on the back of the computer.
- Verify that the green light on the Xbox 360 Wireless Gaming Receiver for Windows lights up.
If these steps resolve the problem, we recommend that you move the other USB powered devices to a powered USB 2.0 hub.
-